Back in September of 2004 I decided that my workshop could use a small form factor computer. While browsing the web, I ran across www.mini-itx.com and I decided to make my new computer a Mini-ITX machine. After browsing the on-line projects, I realized a custom build would be way more fun than a conventional case.
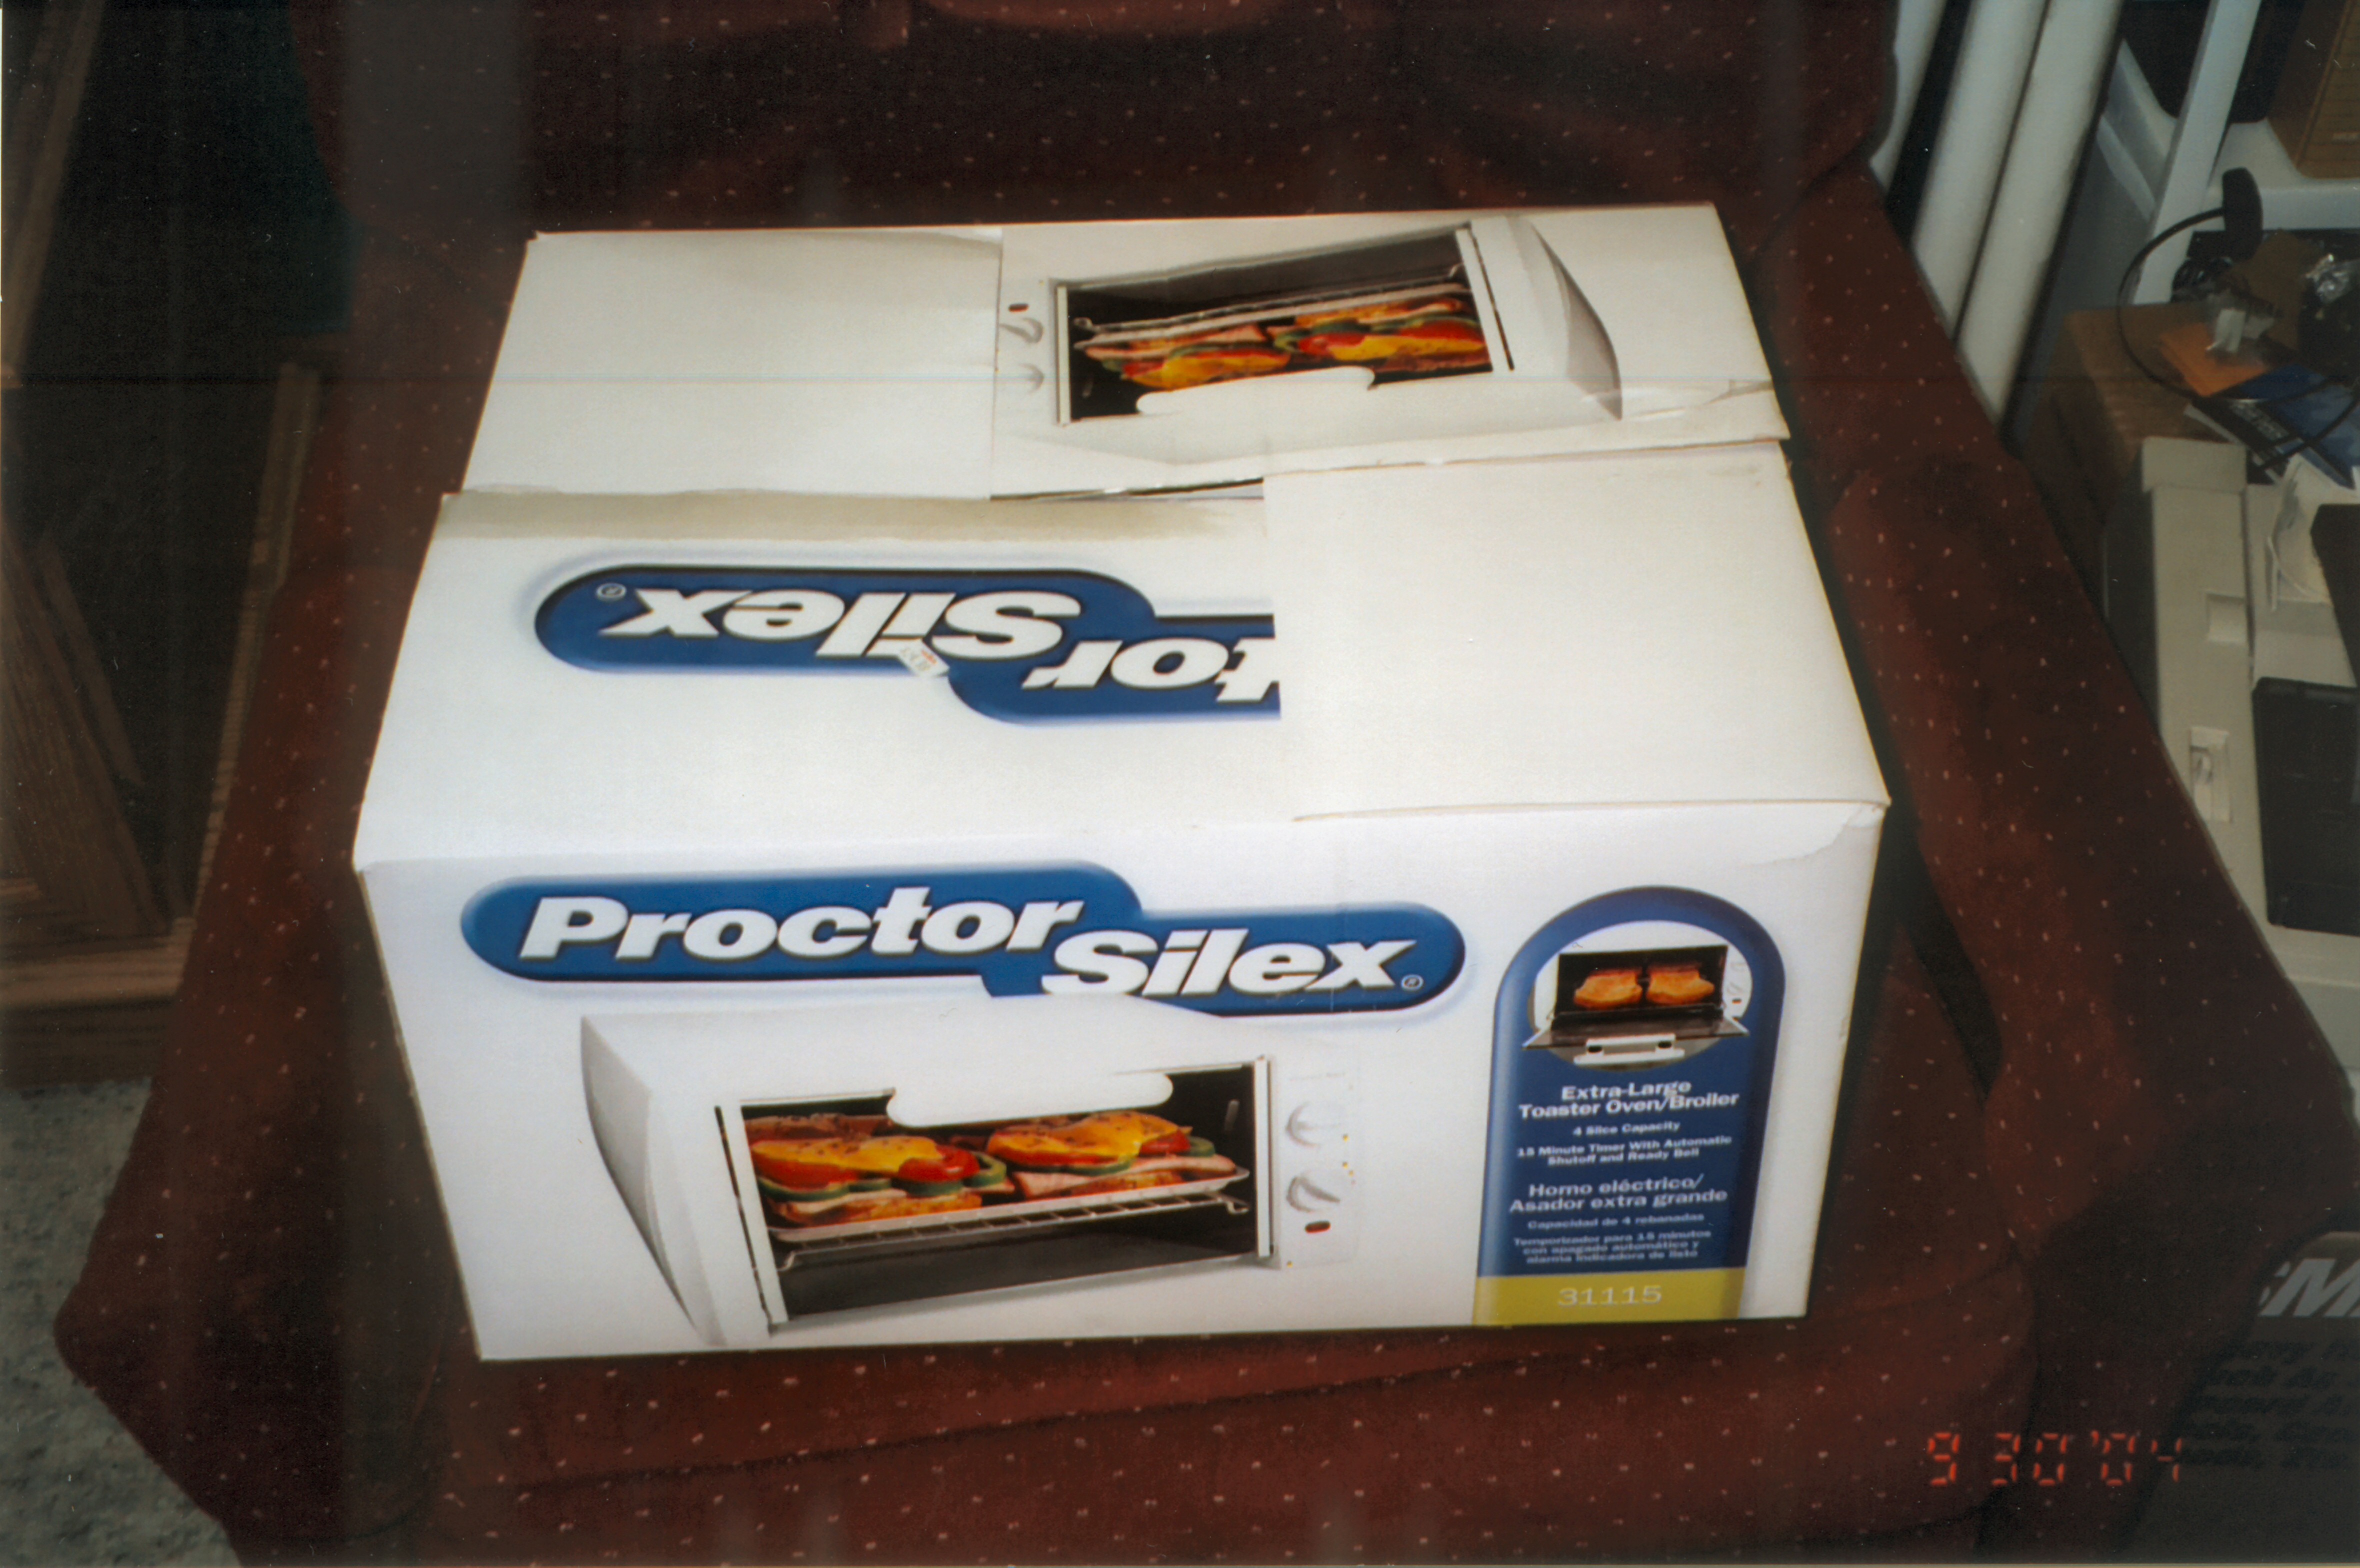
Back in the 90’s, the flying toaster screen saver theme always brought a smile to my face. So I decided on a toaster theme. I bought a Procter Silex toaster from Walmart for $25.
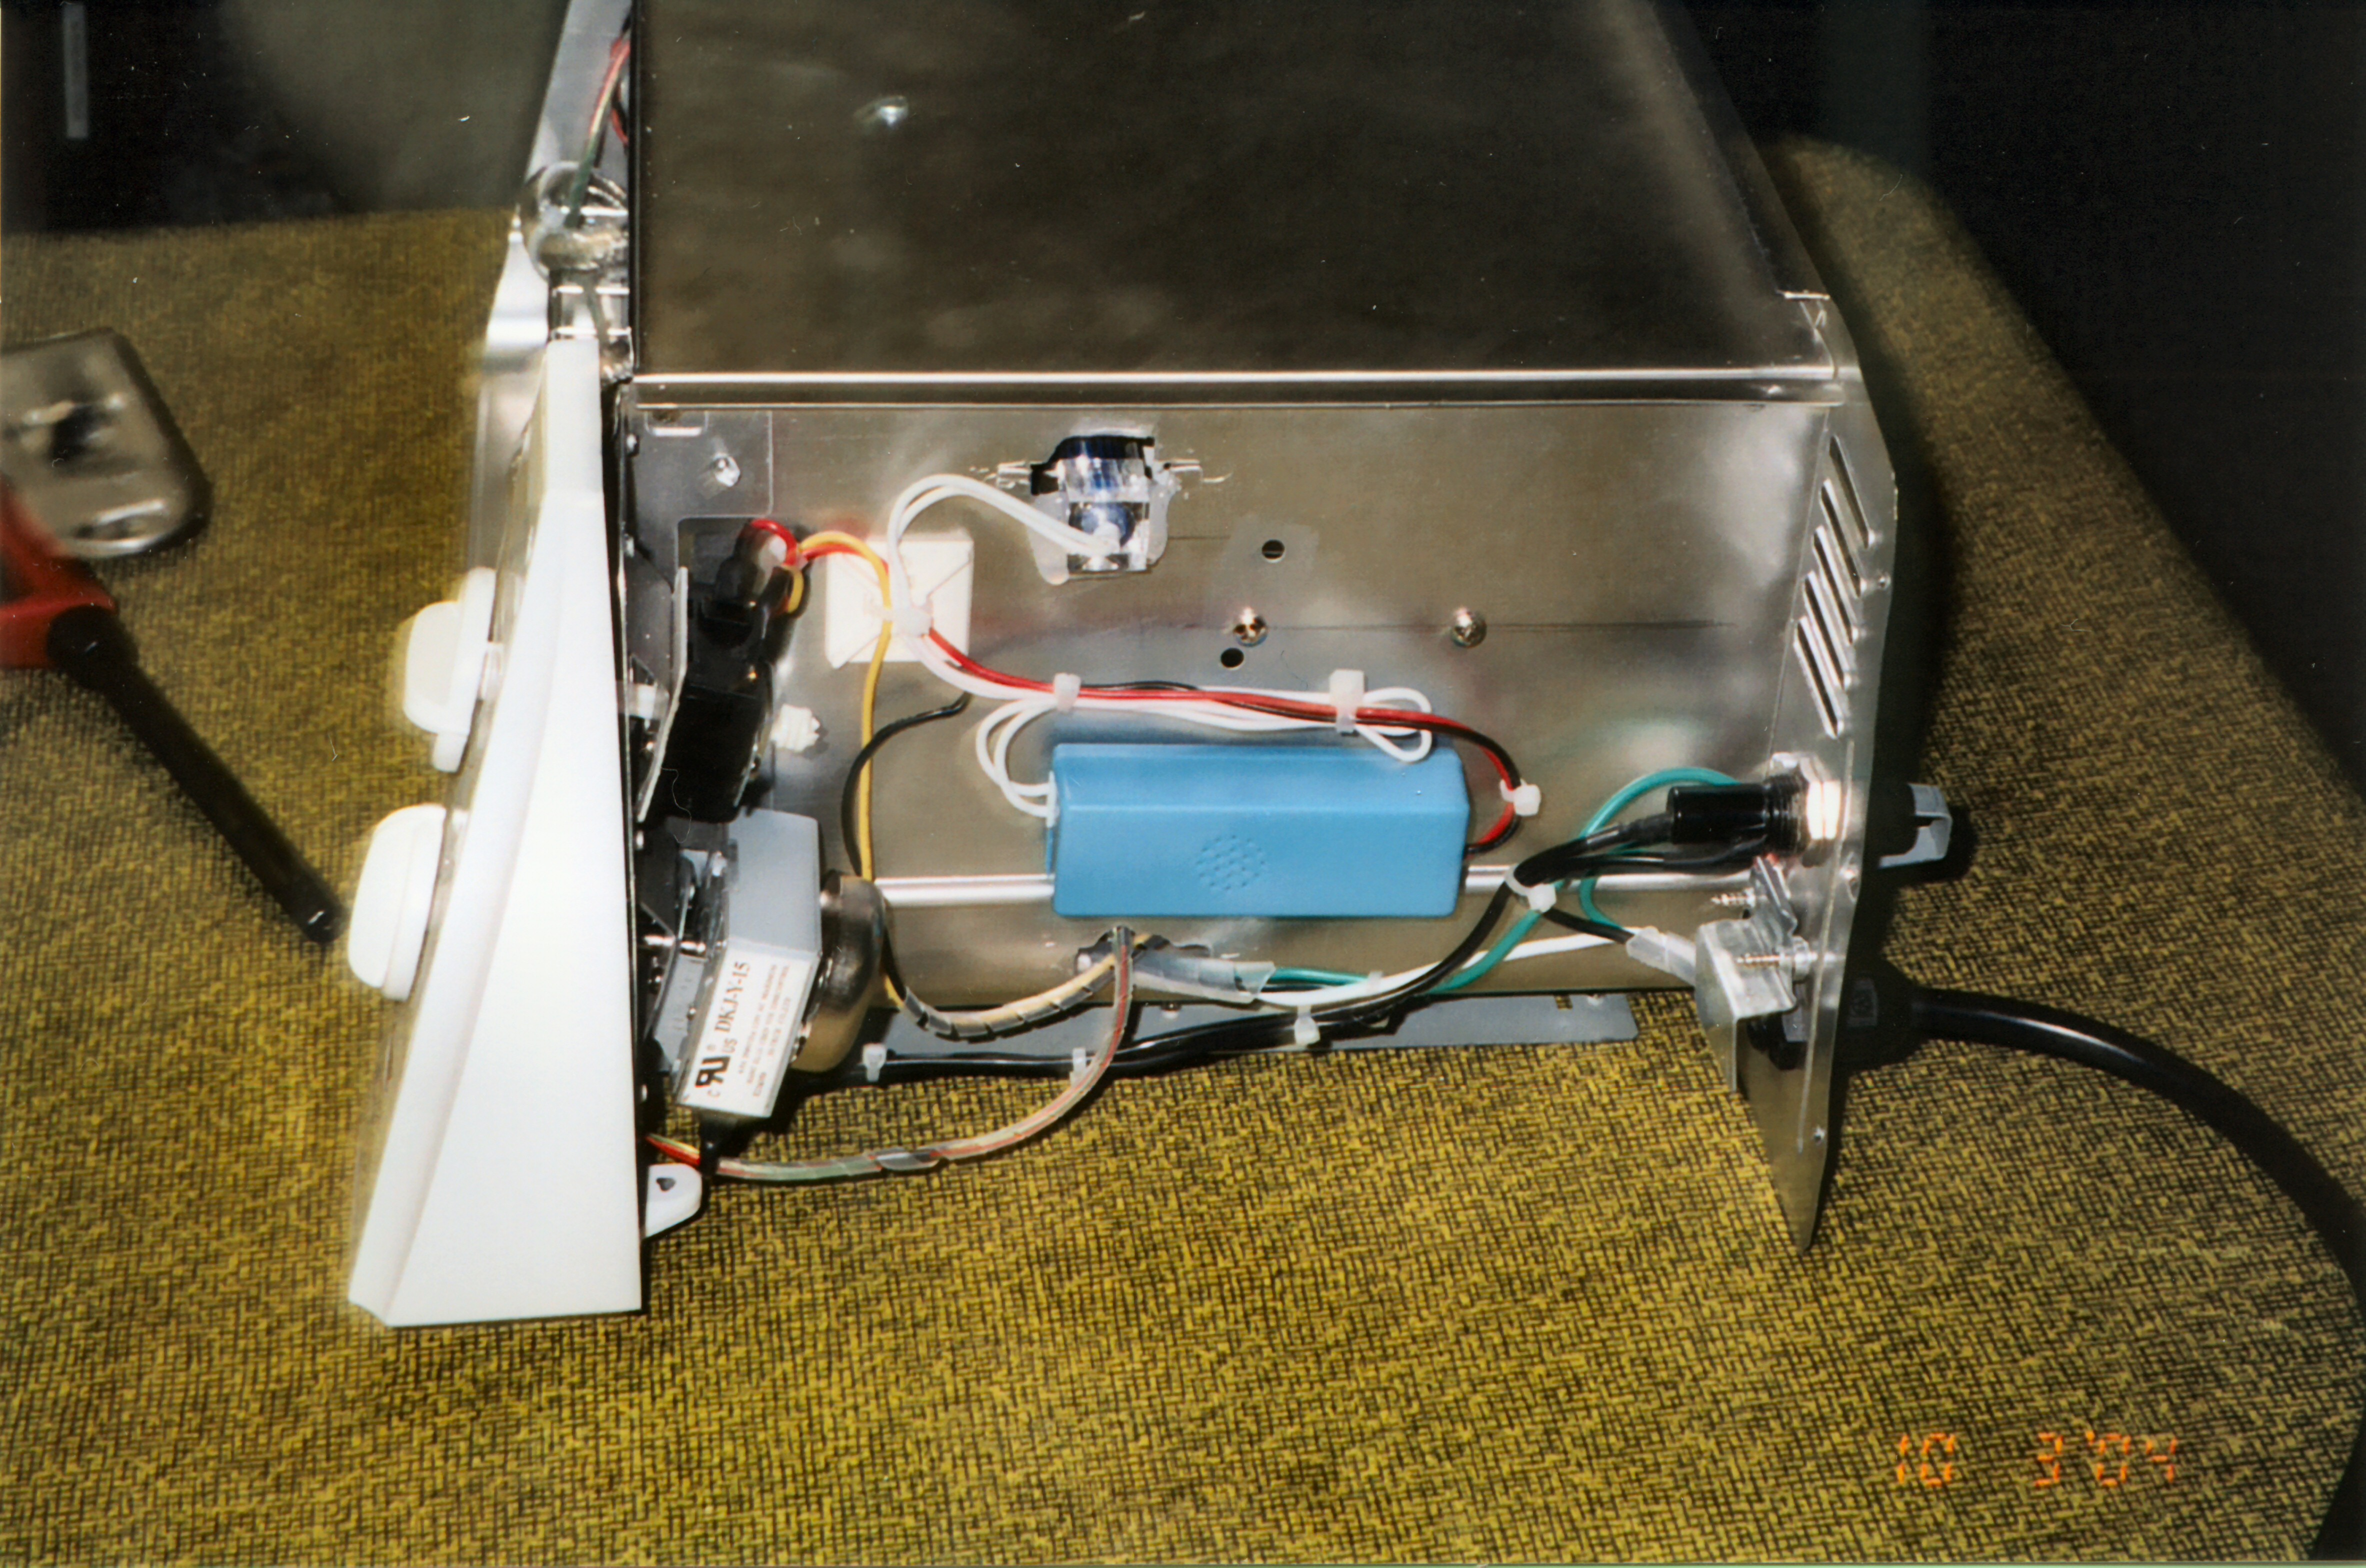
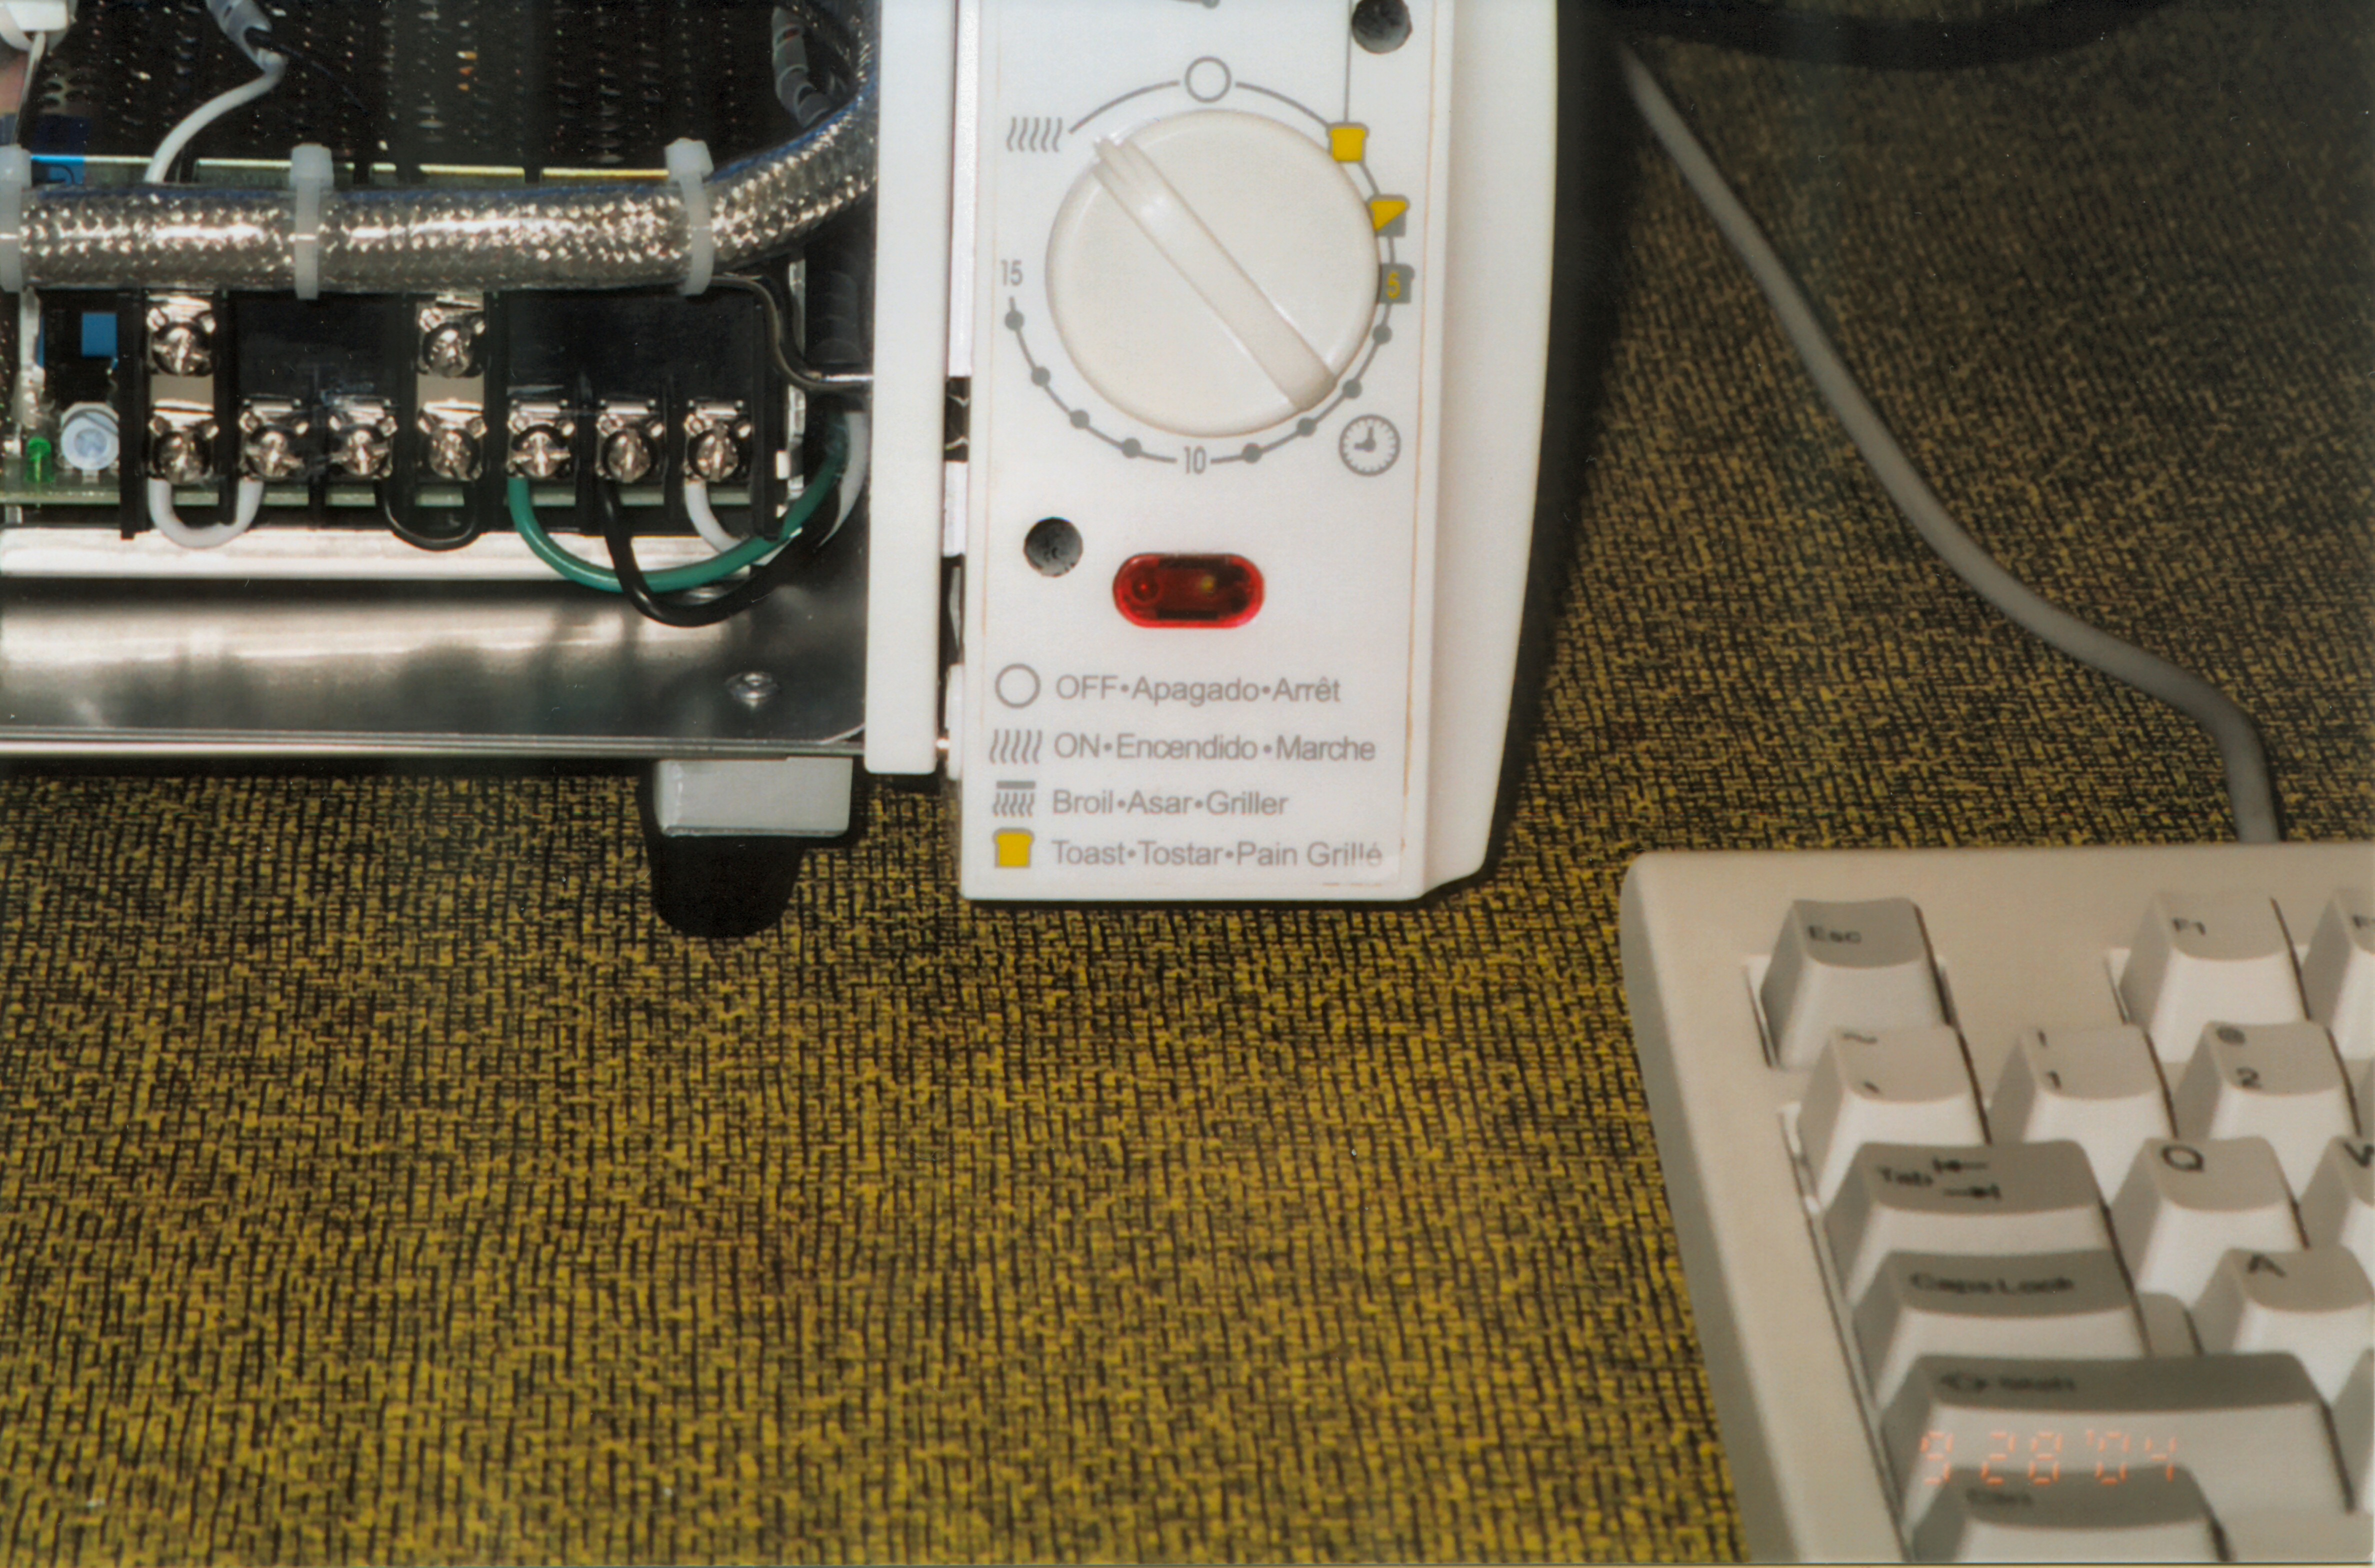
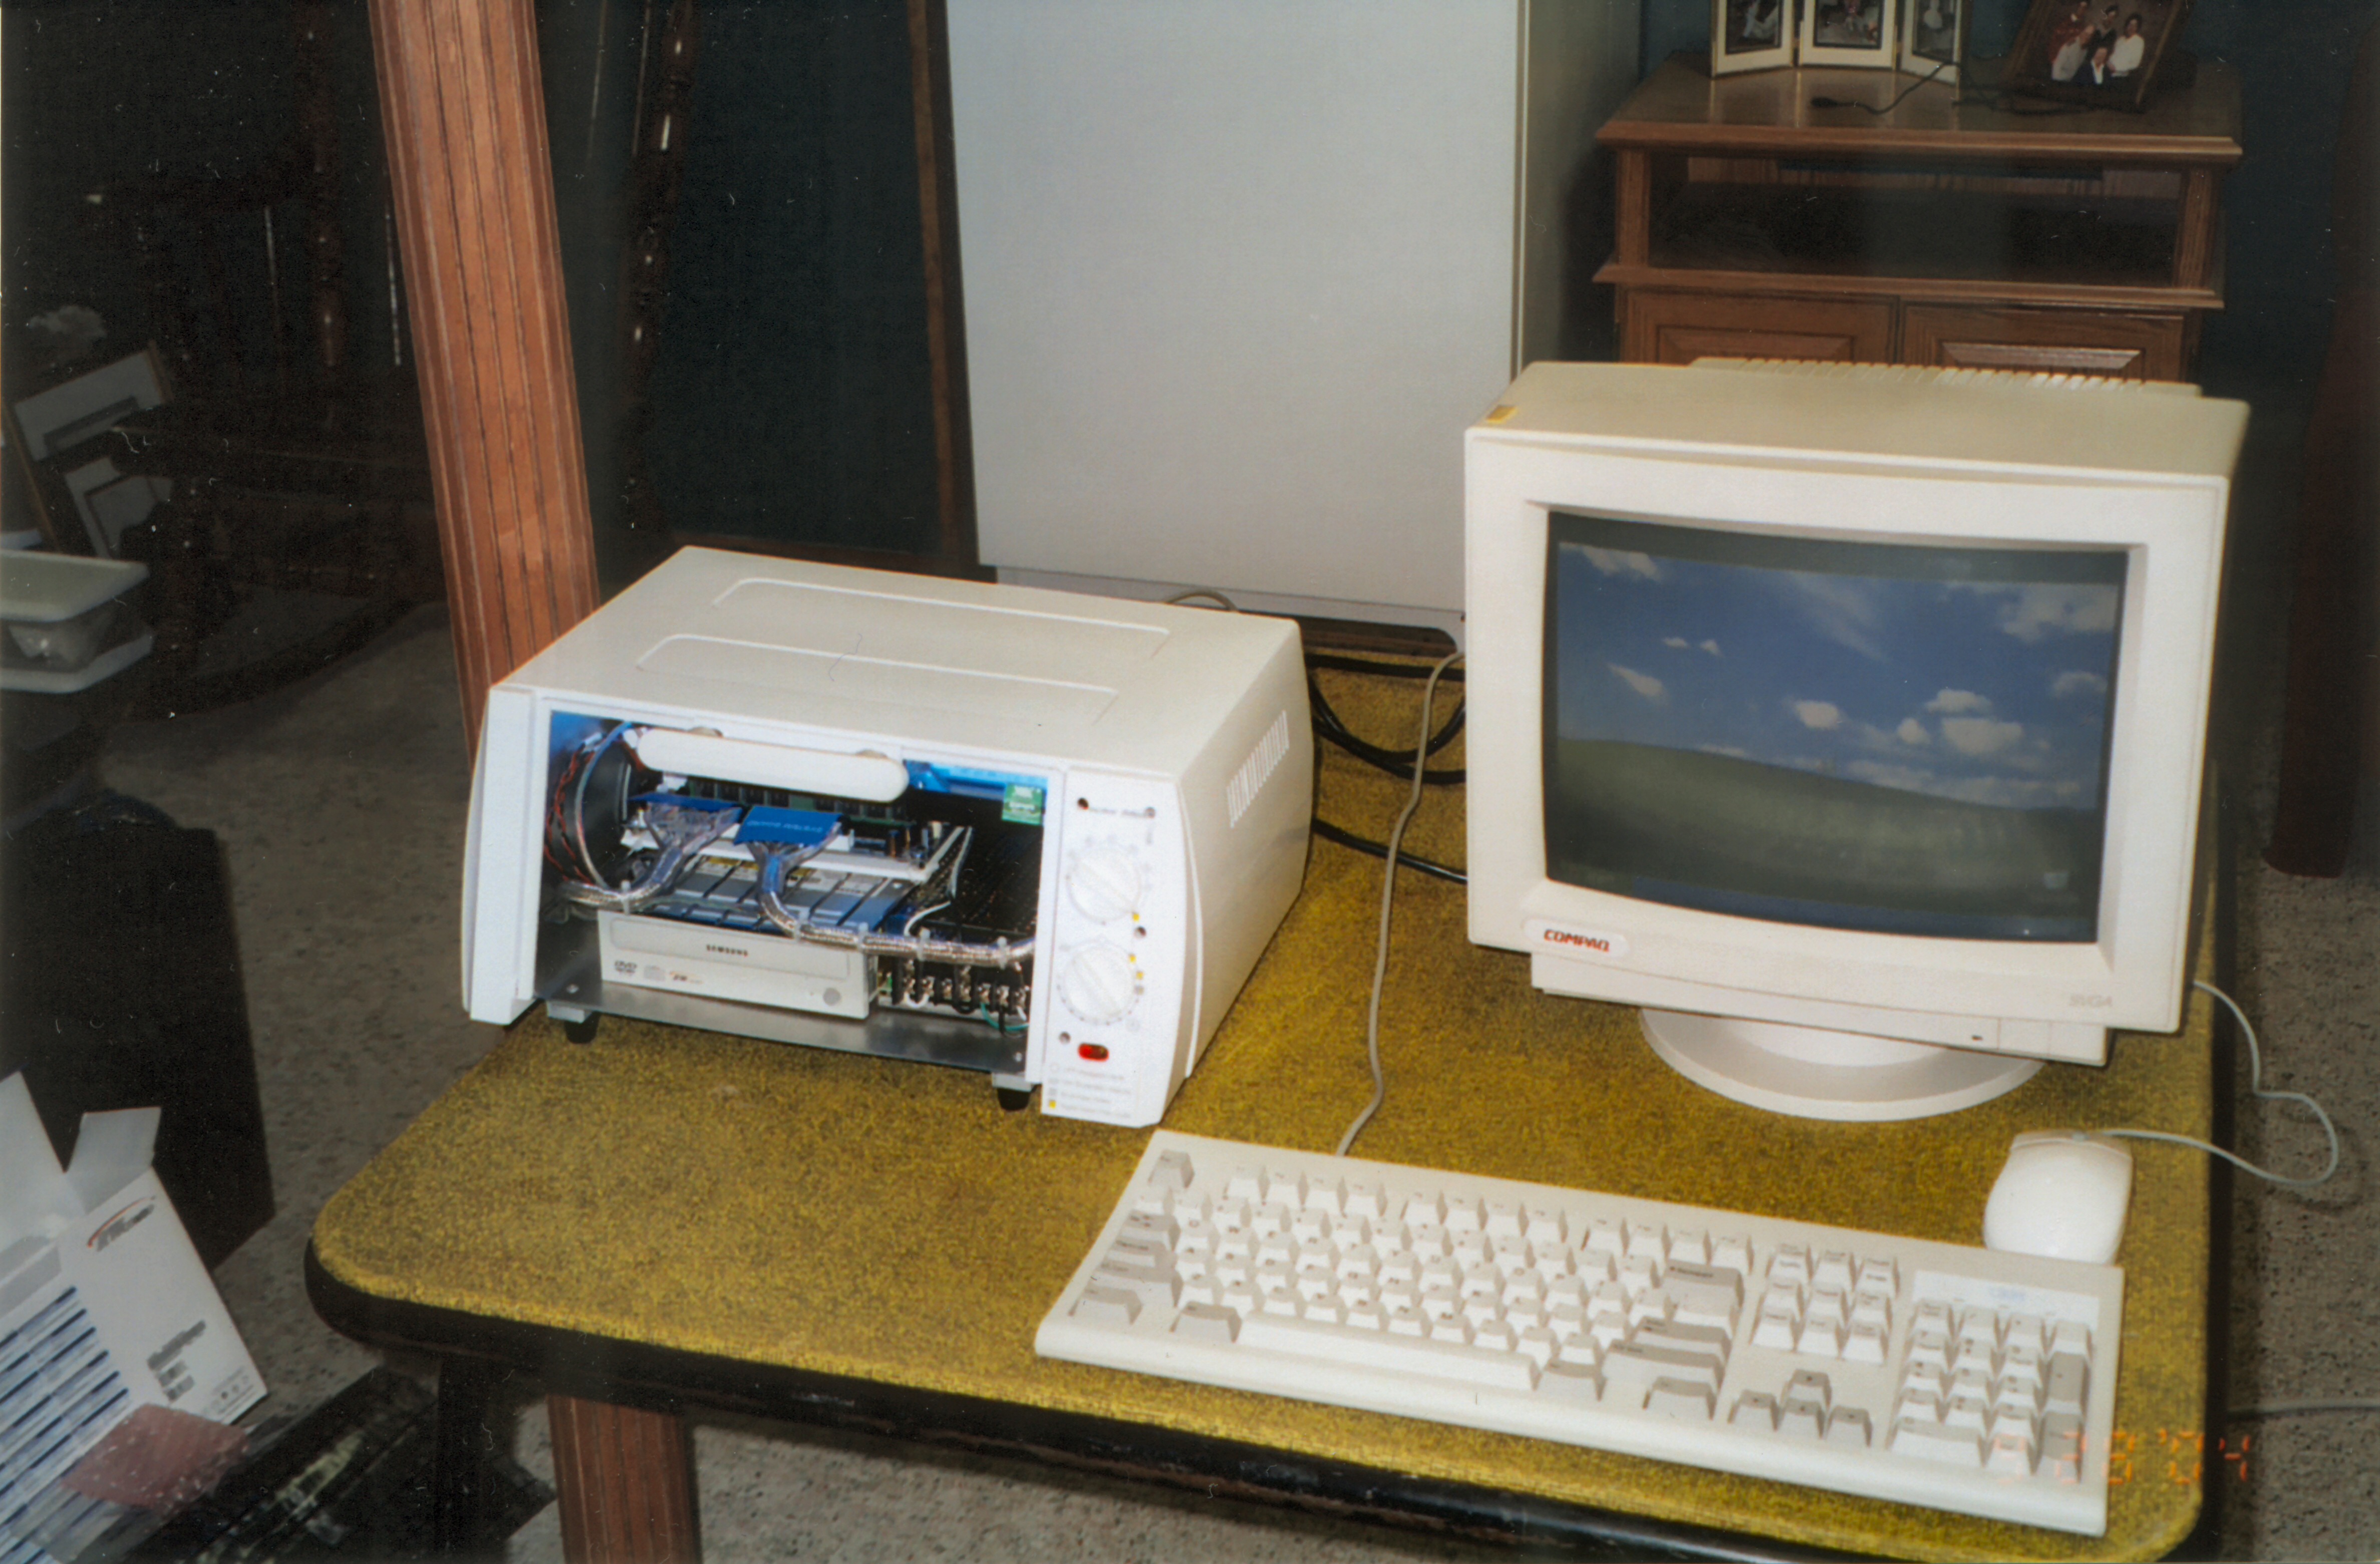
The toaster’s controls were re-purposed for use controlling the computer. In the picture you can see that the toast timer served as the power switch and the function switch controlled the interior lighting. The neon power light was replaced by two LED’s. A green LED served as the power indicator and a red LED showed the computer’s hard drive activity. Both LED’s were glued into the old lamp’s plastic lens cover. The original power cord was used with the addition of a new fuse holder. The blue box is the inverter power supply for the blue cold cathode lamp that was used to light up the computers interior.
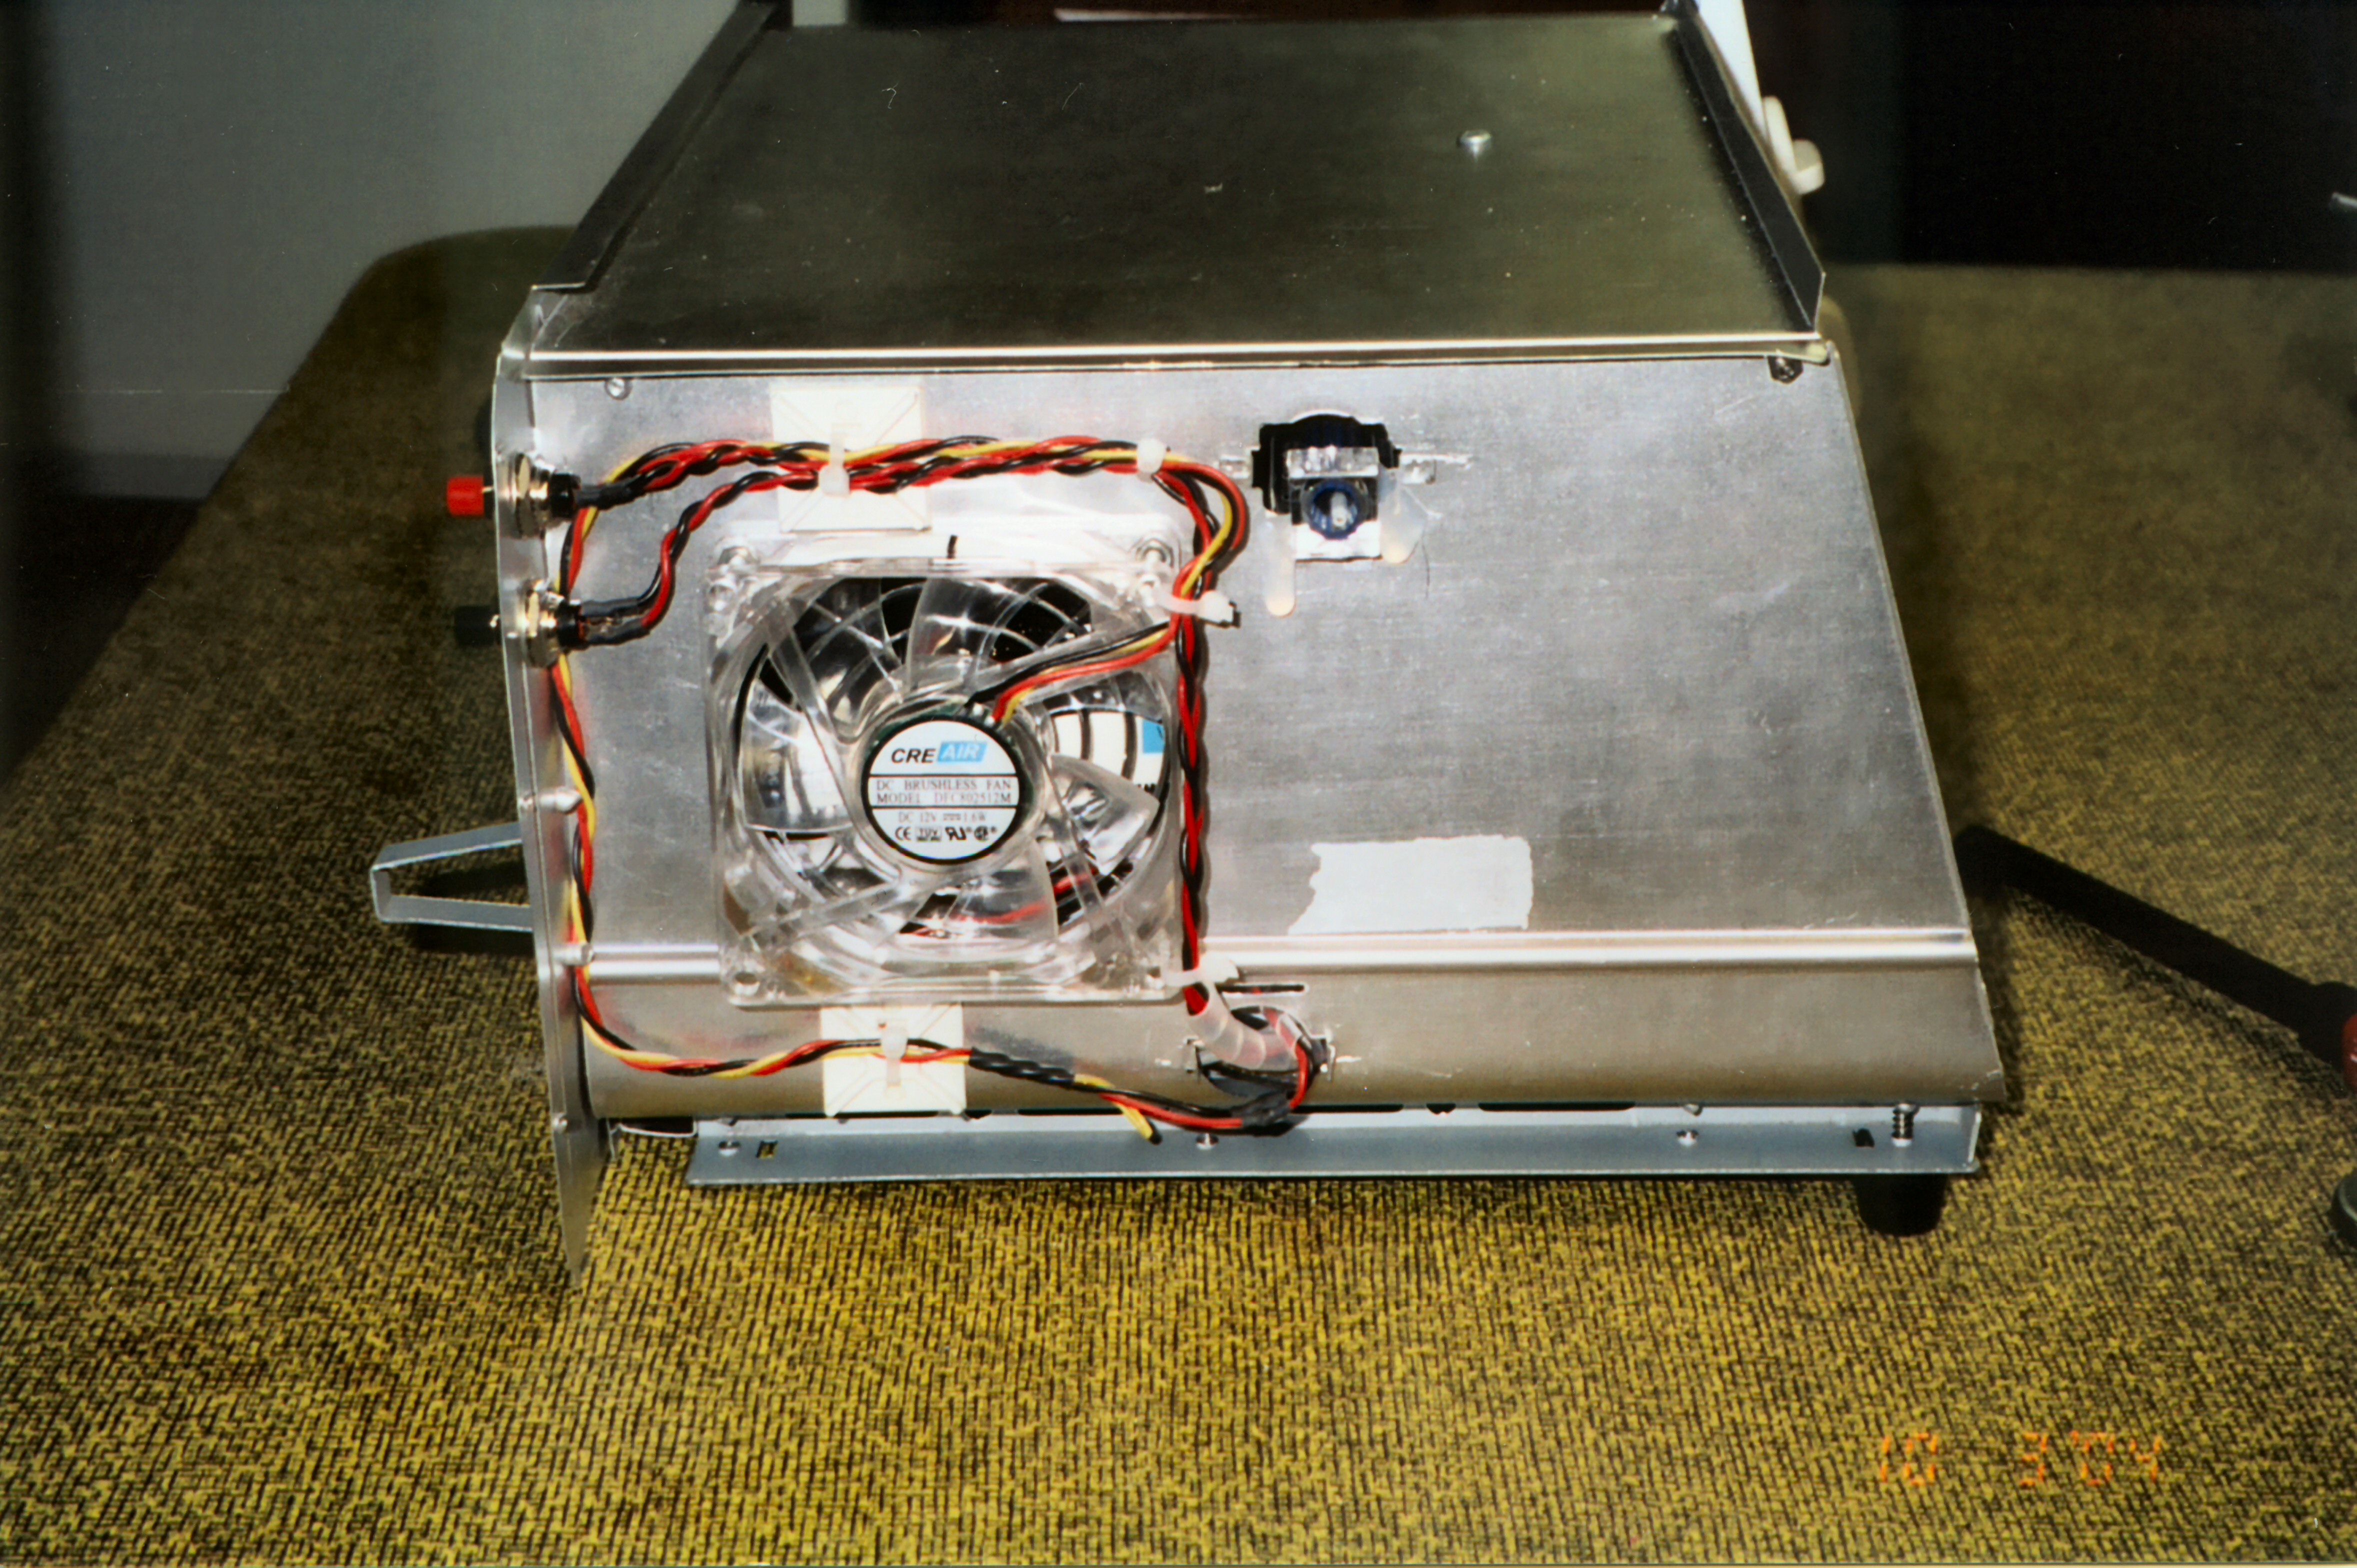
On the other side of the toasters case, I added a cooling fan and two push button switches. The red push-button was for resetting the computer and the black one was for starting it.

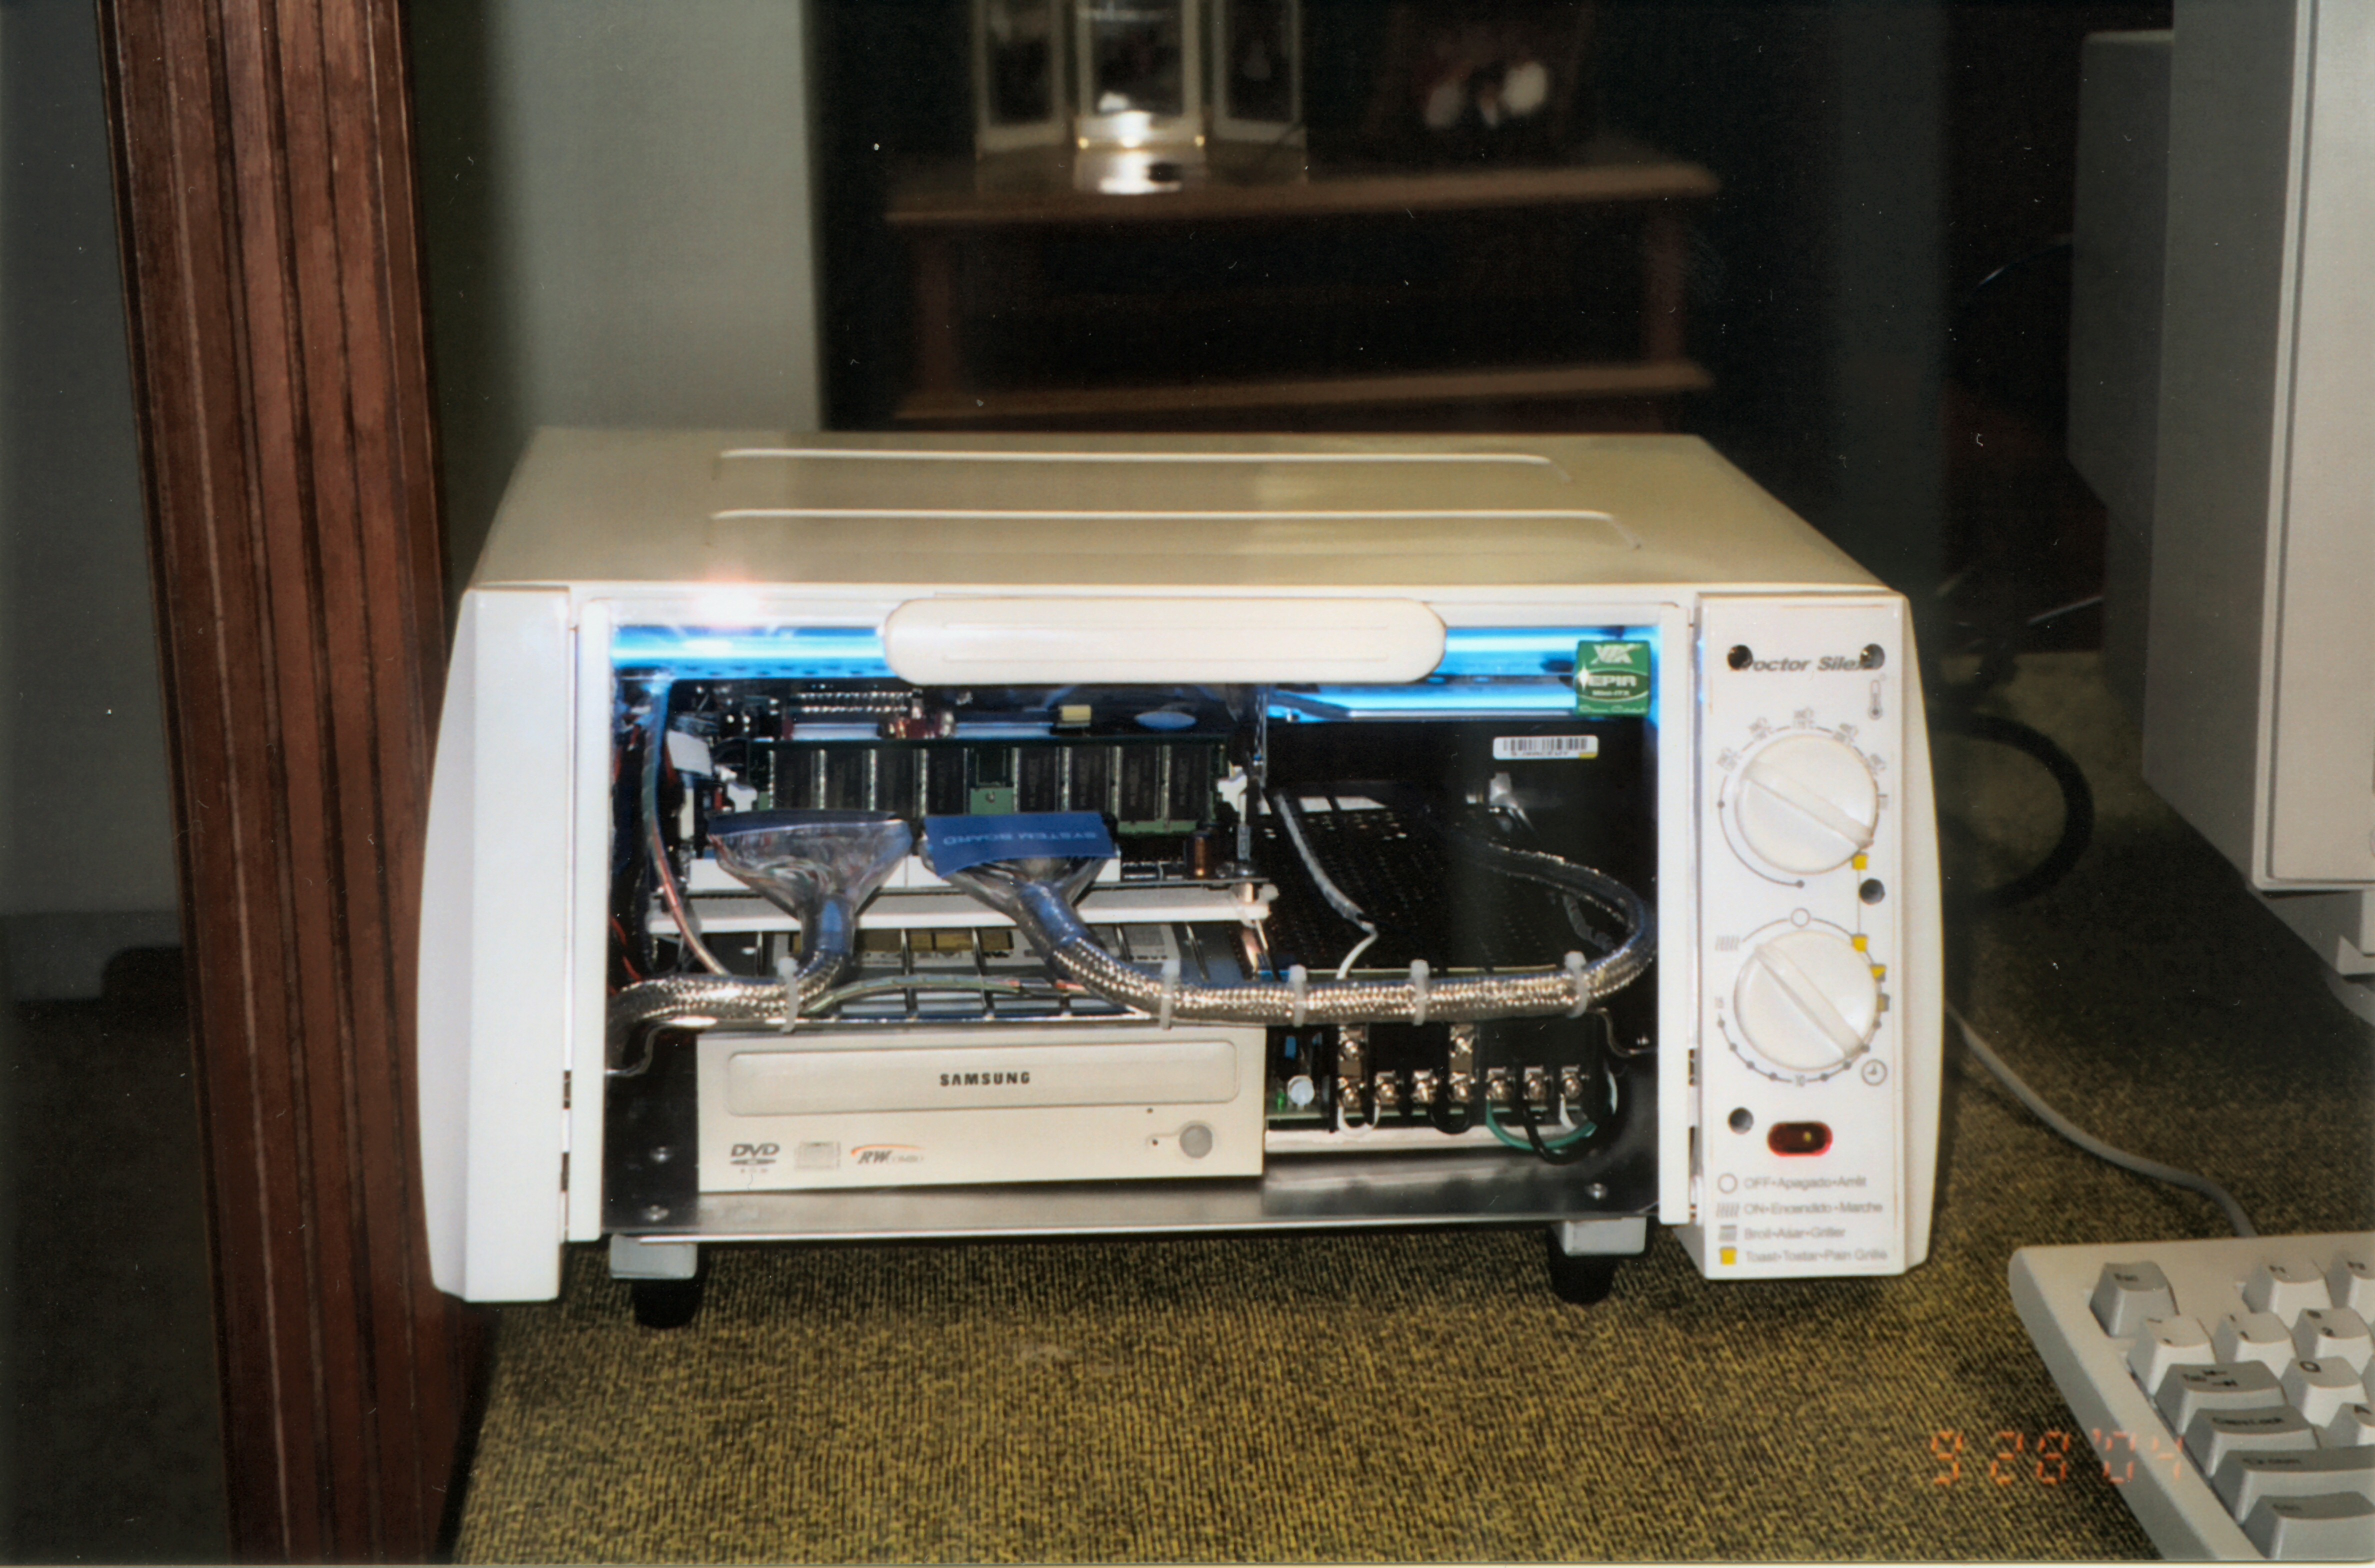
The Motherboard was mounted on a white plastic plate made from an old cutting board. It was held in place by tie wrapping it to the toaster oven’s wire rack. The hard drive was mounted to the ceiling of the toaster oven using some custom brackets I made from scrap aluminum. The CD ROM and power supply were mounted to the bottom of the toaster oven using machine screws. I used a surplus 12 volt switching power supply I bought off of eBay to power the whole project. The computer had another sub-miniature switching power to supply the correct voltages to the motherboard. A blue cold cathode lamp replaced the upper heater element.

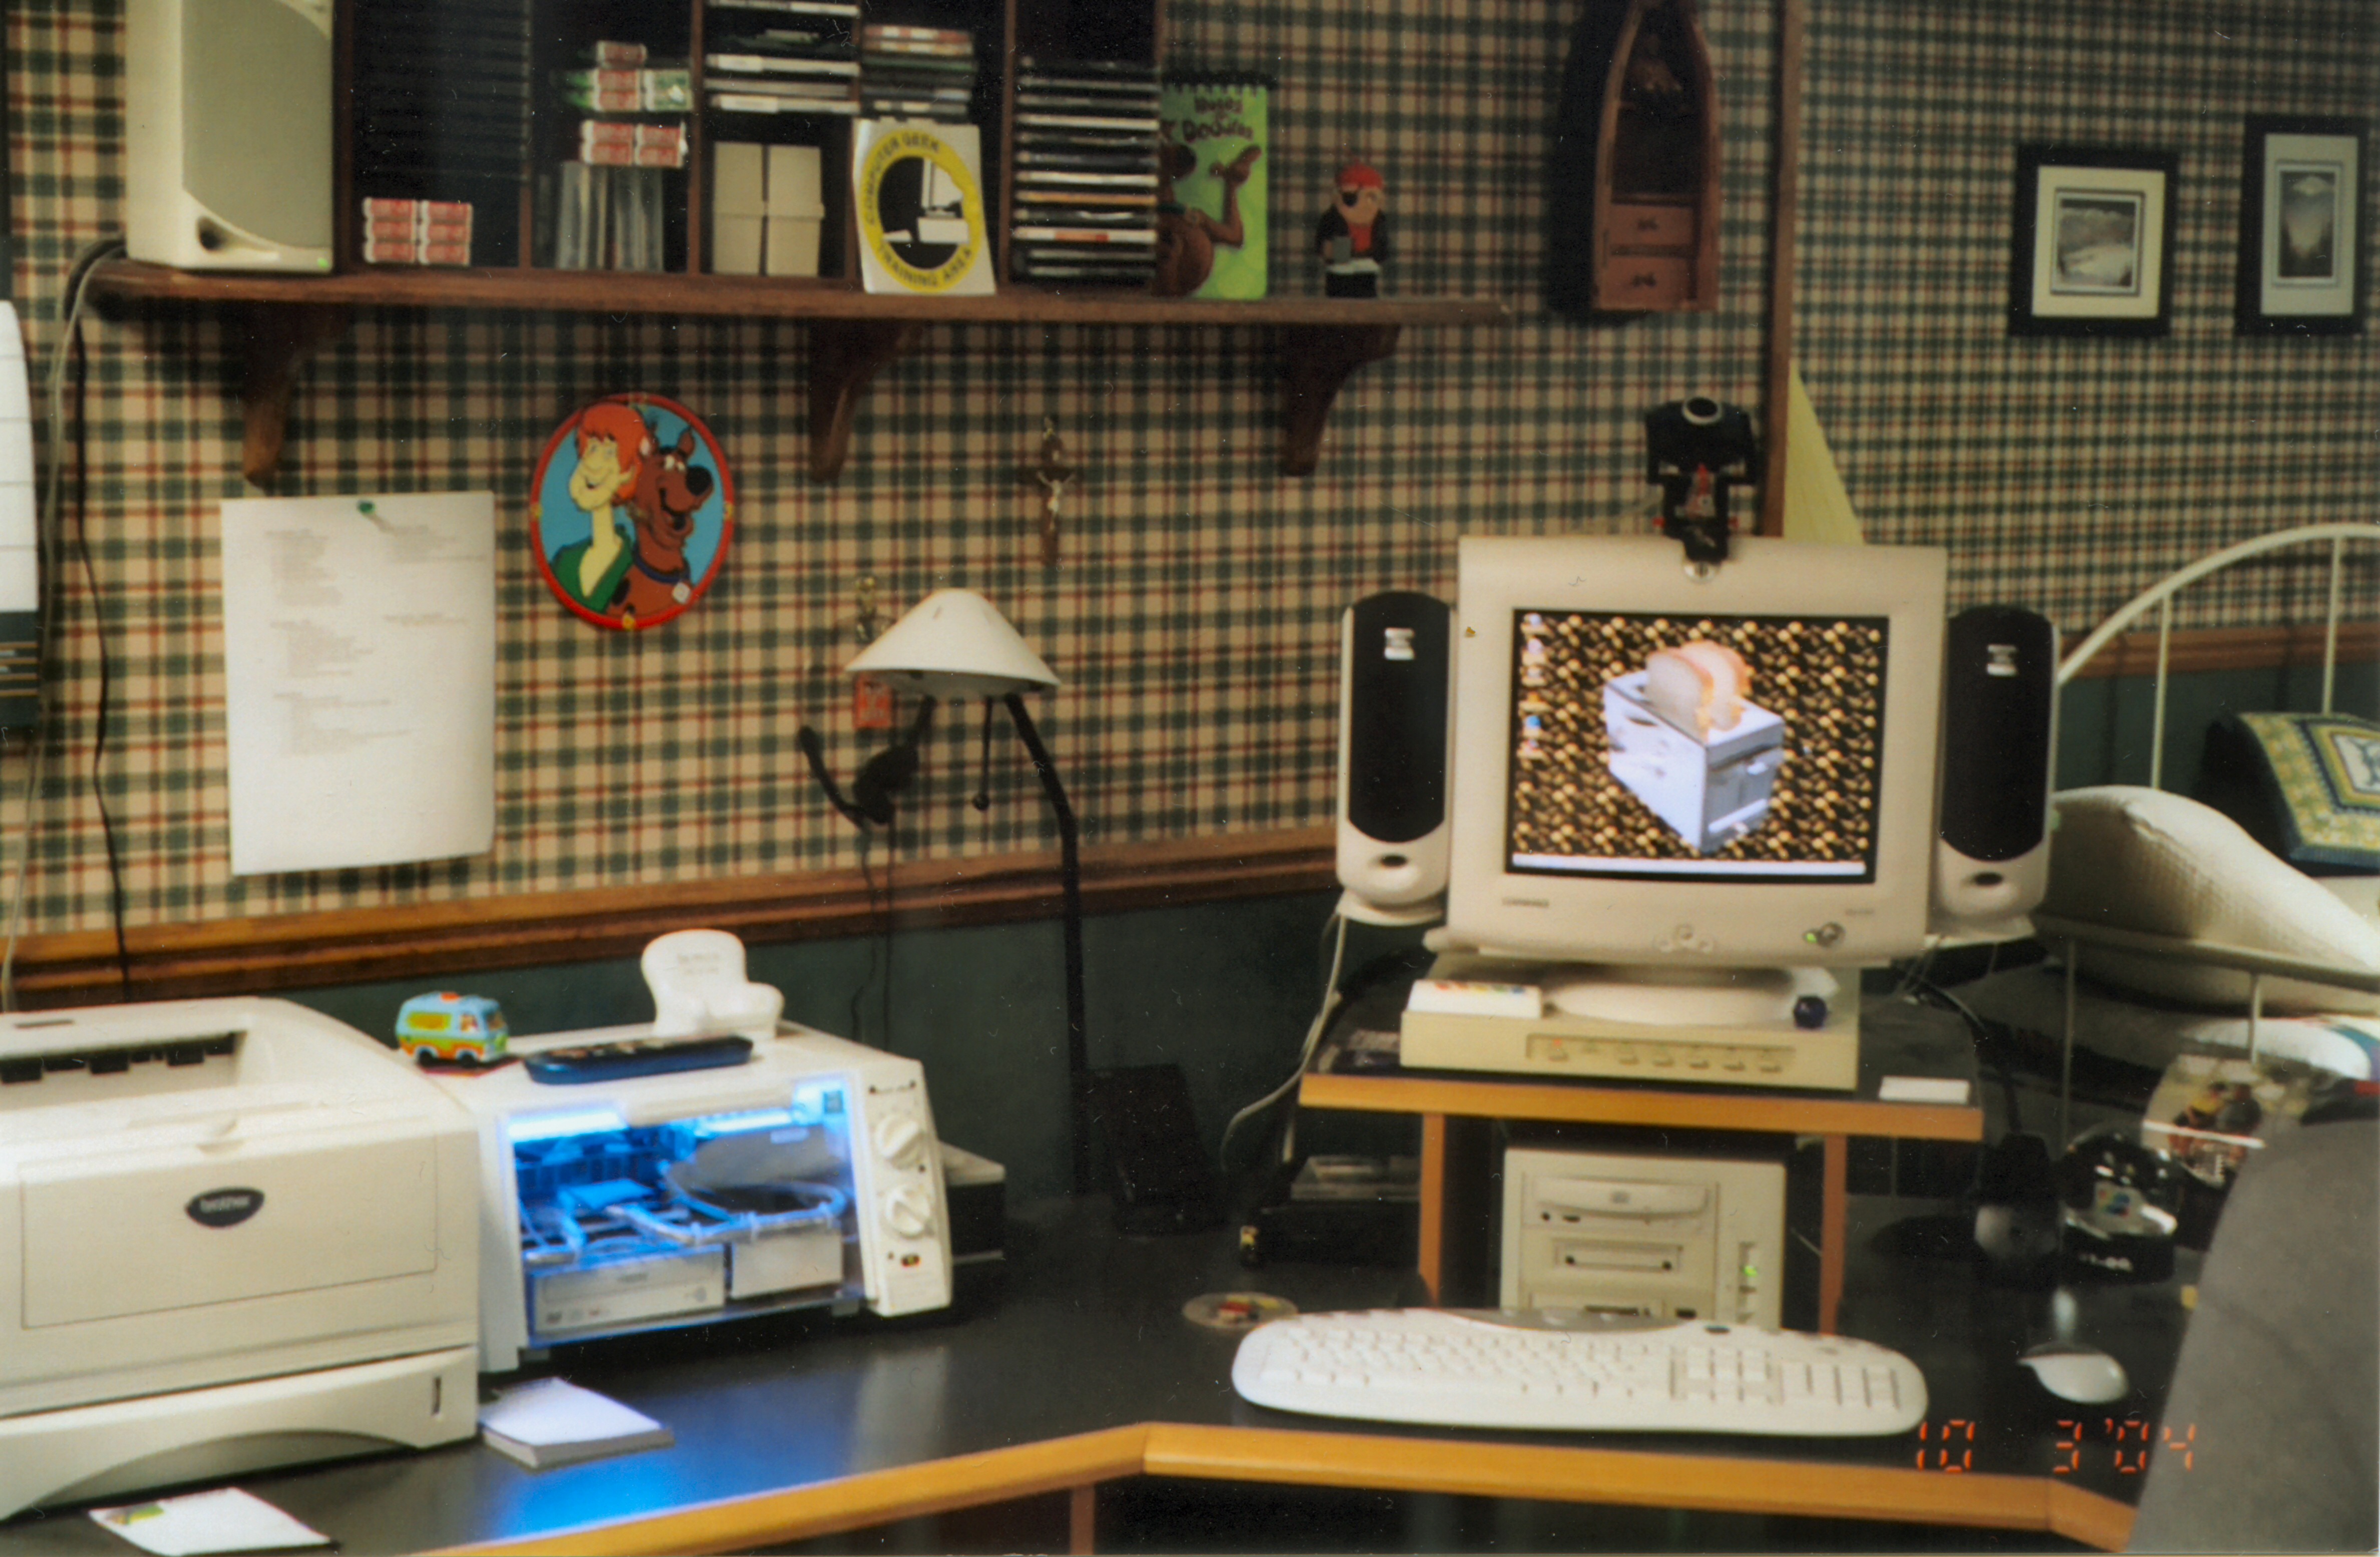
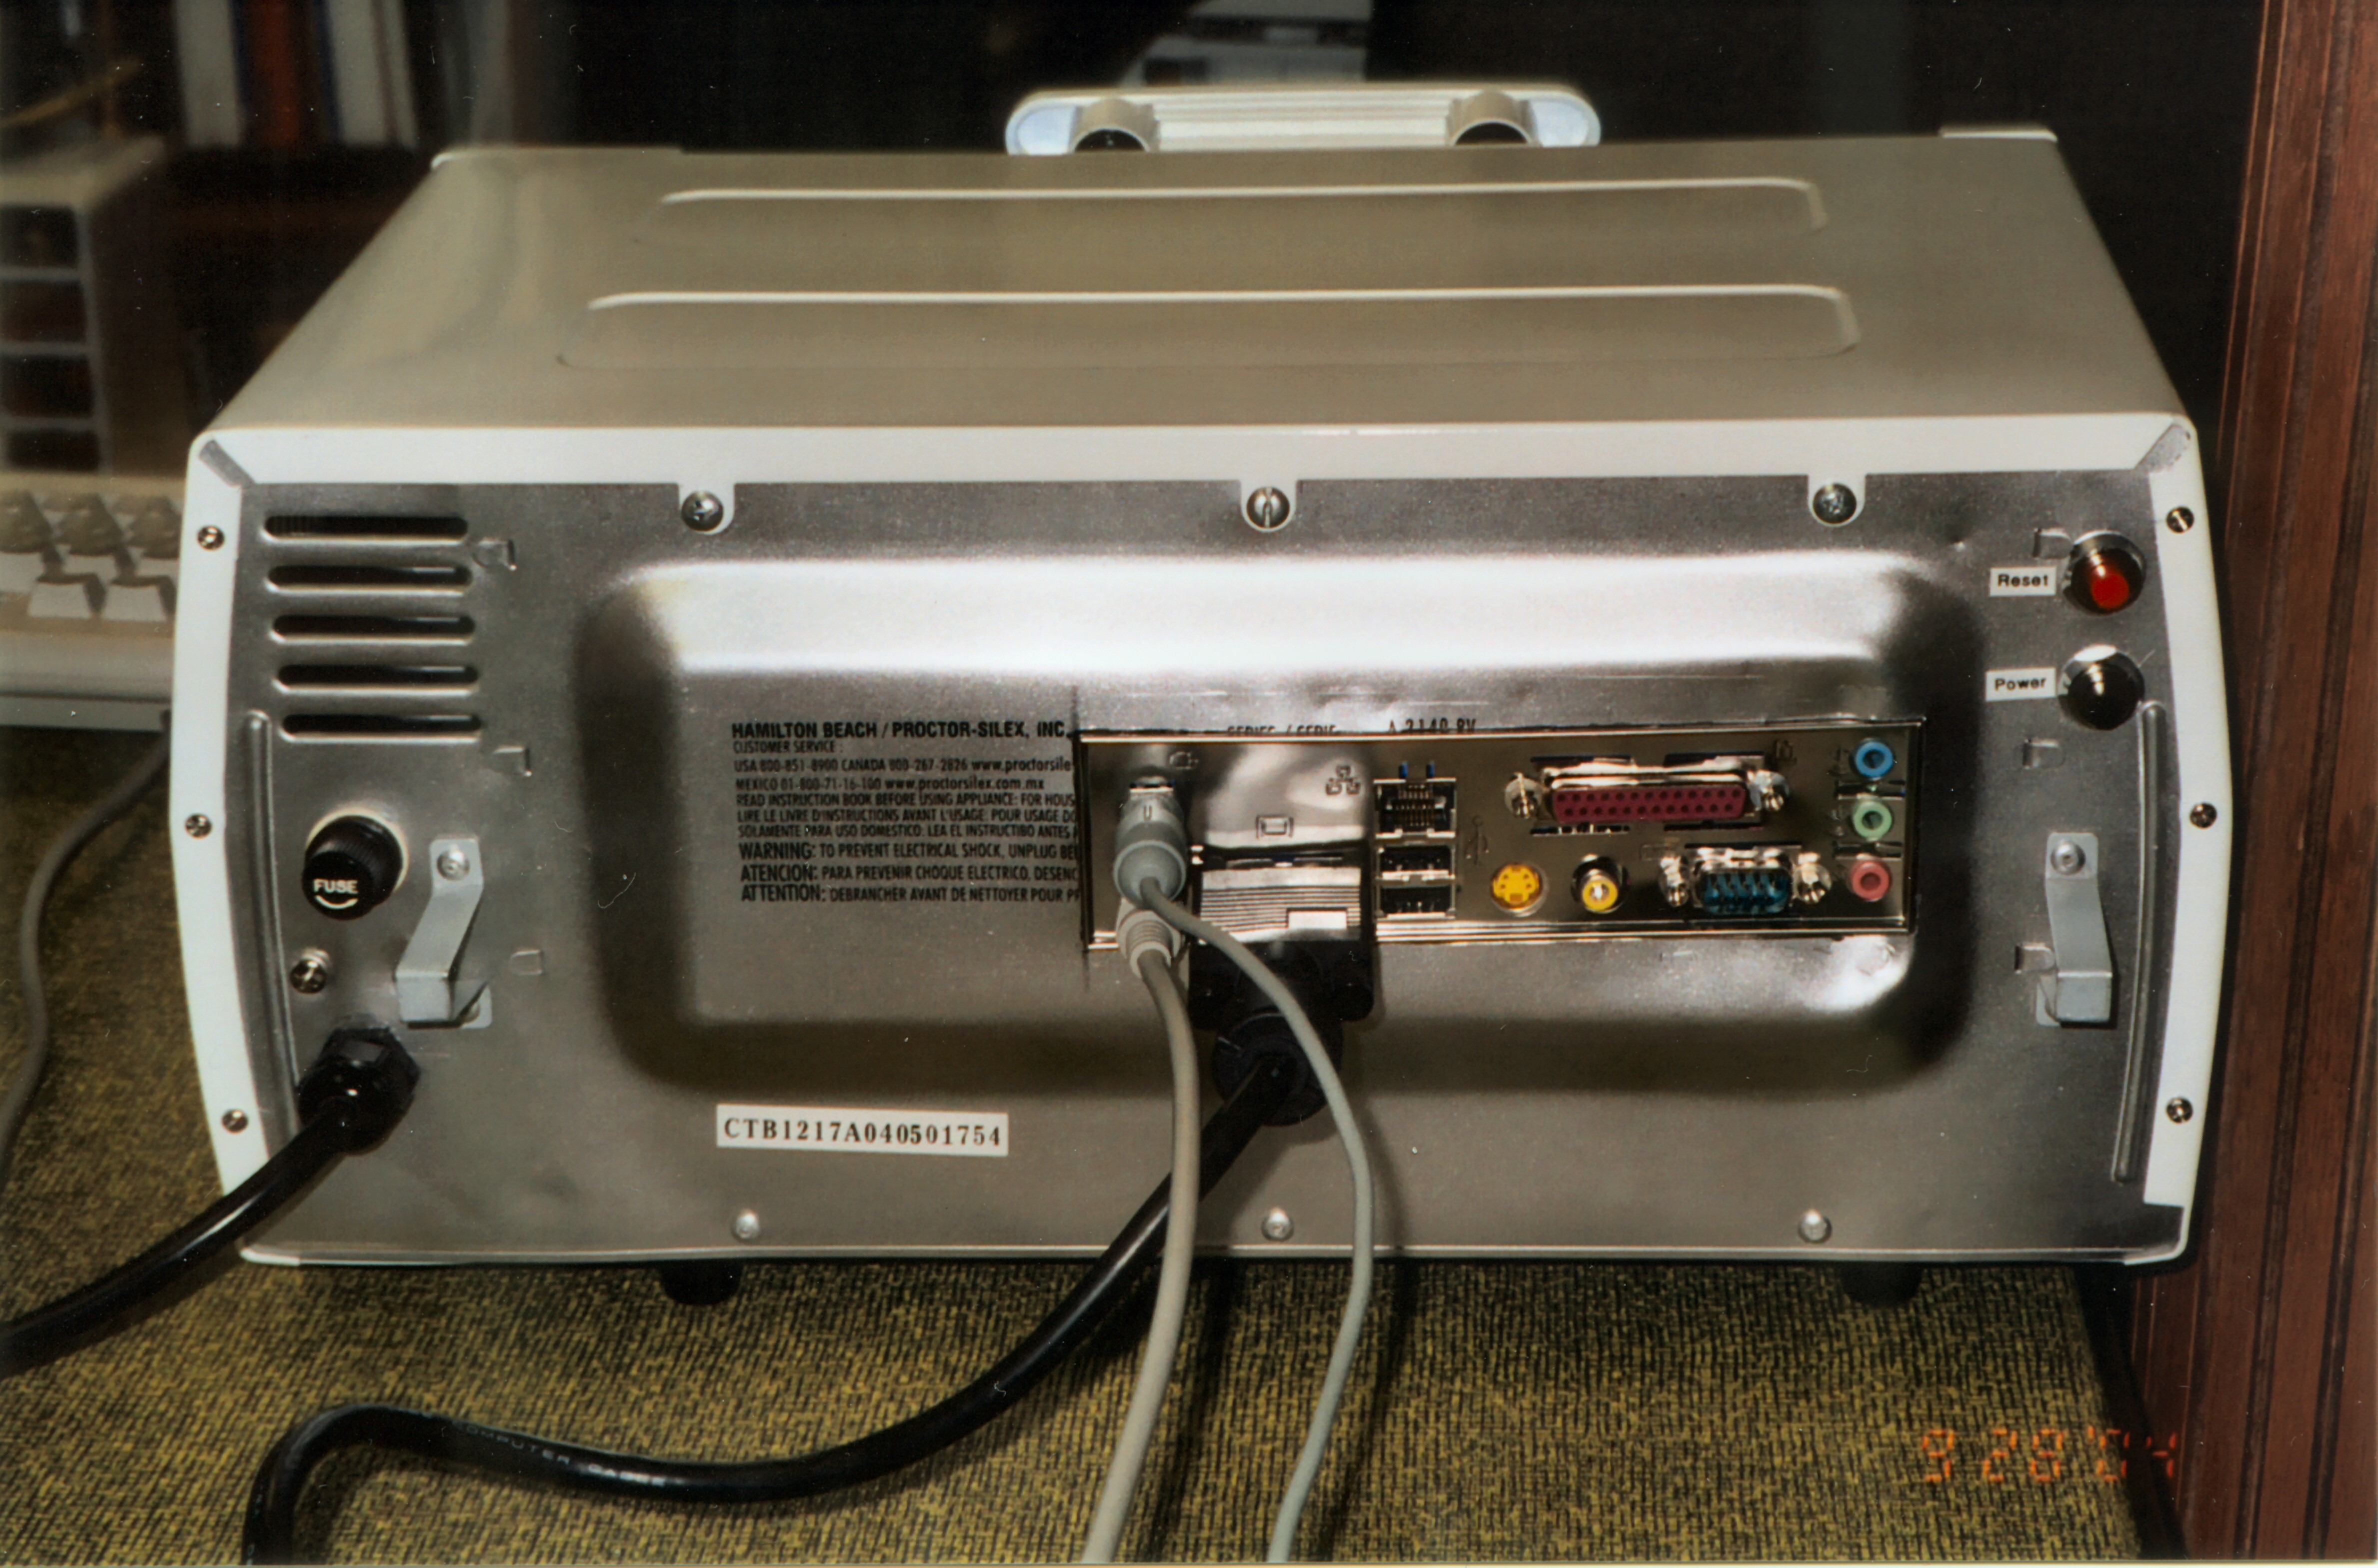
I cut the back panel of the computer with a Dremel tool for the connector panel. The panel is press fitted into the cut out. On the right you can see the system up and running for the first time after loading Windows XP.
Here’s a shot of the finished machine, sitting in my workshop office, after the toaster theme was loaded. I had a toaster background, toast making sound effects and a flying toaster screen saver.